A Simple Time Clock using Arduino
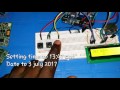
This Article demonstrate how to interface Real Time Clock Module with an Arduino and build a simple time clock which will display time and date on an LCD. The user can set the time via push buttons or via serial monitor.


16 x 2 character Liquid Crystal Display(LCD)
To use the library add this two header files to your source code
To write new value to the Module for example to set the time you use below method
Drop your comment if you have anything you will like to share or if you encounter any problem.
Things Needed
- Arduino
- RTC module
- 16x2 character LCD
- Push Button x3
- Variable resistor
- Bread Board
- jumper cables
 |
| Figure 1: BreadBoard Diagram |
Setup the system as shown in the breadboard diagram (figure 1) It shouldn't be exactly the same as shown here; you can arrange it in any way you think is cool provided the connection are correct as shown in the schematic diagram.
 |
| Figure 2: Schematic Diagram |
Notes about the hardware connections
RTC module
RTC module contains DS1307, which is a low-power clock/calendar with 56 bytes of battery-backed SRAM. The clock/calendar provides seconds, minutes, hours, day, date, month, and year information. it use I2C communication protocol SDA pin of the RTC is connected to arduino pin A4 (SDA pin of the Arduino uno) and SCA pin to arduino pin A5(SCA pin of the arduino Uno) Read more here. The Address to access the DS1307 is 0x68. Click the image to buy one.
16 x 2 character Liquid Crystal Display(LCD)
A 16 x 2 LCD display consists of two rows of display with each row consisting of 16 characters.
The module has in 16 pins as shown on the schematics three of the pins are used for control that is Register Select (RS), Read/Write (RW) and Enable(E) and 8 data pins (D0-D7) are used in sending data to the lcd. The lcd support two mode of data transfer that is 8 bit mode and the 4 bit Mode. in the 8 bit mode, all the the 8 data pins are used to send data to the screen, byte at a time, while in the 4 bit mode only pin D4-D7 are used to send first higher 4 bit of a byte followed by the least 4 nibble this implies that, it take twice the time of 8 bit mode but save a lot of wires. Click the image to buy one
The module has in 16 pins as shown on the schematics three of the pins are used for control that is Register Select (RS), Read/Write (RW) and Enable(E) and 8 data pins (D0-D7) are used in sending data to the lcd. The lcd support two mode of data transfer that is 8 bit mode and the 4 bit Mode. in the 8 bit mode, all the the 8 data pins are used to send data to the screen, byte at a time, while in the 4 bit mode only pin D4-D7 are used to send first higher 4 bit of a byte followed by the least 4 nibble this implies that, it take twice the time of 8 bit mode but save a lot of wires. Click the image to buy one
Button Connection
The button connected to pin D4 will be use to enter settings mode once it is pressed and hold for 1 sec it will go to setting mode. Button connected to pin D3 and pin D5 will be used to decrease and increase the values respectively.
Note about the source Code
I am using a simple and easy to use library to access the RTC module, it can be downloaded from here https://github.com/dtu-mekatronik/HCRTC. Include the library to Arduino IDE by going to Sketch → Include a Library → Add .Zip file and then browse to where you saved the file you just just downloaded.
To use the library add this two header files to your source code
#include <Wire.h>
#include >HCRTC.h>
Create an instance of the library like
HCRTC myClock
To start retrieving information from the RTC module first give the address of the DS1307
myClock.RTCRead(0x68);
After you that you can use these function to retrieve infomation from the module:
myClock.GetTimeString() ;  // to get the time in this form hh:mm:ss
myClock.GetDateString() ;   //to get the date in this form DD/MM/YY
you can use below methods to get individual values too
myClock.GetHour(); // to get hour
myClock.GetMinute(); //to get minute
myClock.GetSecond(); // to get Second
myClock.GetDay(); // to get day
myClock.GetMonth();
myClock.GetYear();
To write new value to the Module for example to set the time you use below method
myClock.RTCWrite(address,year,month,day,hour,minute,second,DayOfWeek);
//example
myClock.RTCWrite(0x68,17,3,4,1,15,0,1);
About the LCD
first include the lcd header file like
#include <liquidcrystal.h>
Then create an instance of the lcd; I am using 4 bit mode so I will do it as shown below, you can read more about the lcd function from here
LiquidCrystal lcd(RS,E,D4,D5,D6,D7);
For this project, the pins were connected like this
LiquidCrystal lcd(6,7,8,9,10,11);
We initialize the lcd by writing
lcd.begin(16,2); // 16,2 because we are using a 16 by 2 character lcd
To print information to the screen you call lcd.print("hello"); hello can be any string you want to print.
Full Source Code
Drop your comment if you have anything you will like to share or if you encounter any problem.
A Simple Time Clock using Arduino
 Reviewed by
Zakaria Mohammed
on
July 04, 2017
Rating:
Reviewed by
Zakaria Mohammed
on
July 04, 2017
Rating:
Reviewed by
Zakaria Mohammed
on
July 04, 2017
Rating:


No comments :